NEED TO BE DONE
This is the multi-page printable view of this section. Click here to print.
iiziRun Development and App Distribution
iiziRun Development and App Distribution
- 1: Set up iiziServer for live development
- 2: iiziRun Developper
- 3: iiziRun Custom
- 4: Distribution of your iiziApp
- 5: How to run your application?
1 - Set up iiziServer for live development
Set up iiziServer for live development
The two apps for mobile, iiziRun Developer and iiziRun Custom, are downloaded by both the developer and end-user for testing or consuming an iiziApp. You will use iiziRun Developer on all your mobile devices as you test and develop with iiziGo. Your finished application is deployed with a special version of iiziRun Custom that has a custom graphical appearance to represent your software’s branding and meant to be downloaded by the consumer of your application.
There is a tutorial down below, you need to do a quickstart project:
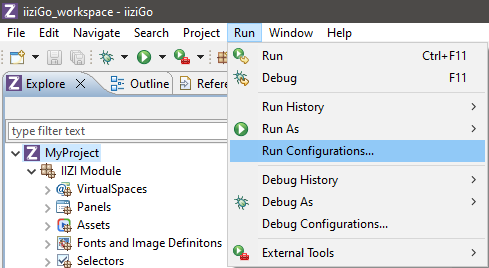
– To use the iiziServer included in iiziGo, only minimal server configuration is required. In the Eclipse Run/Debug menu, find and click the small menu drop down next to the green Run icon and choose Run Configuration.
– You can also go to Run in the main menu and choose Run Configurations… to open the server configuration editor.
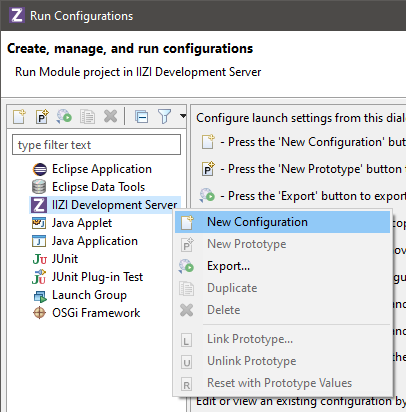
– Right-click IIZI Development Server and choose New Configuration.
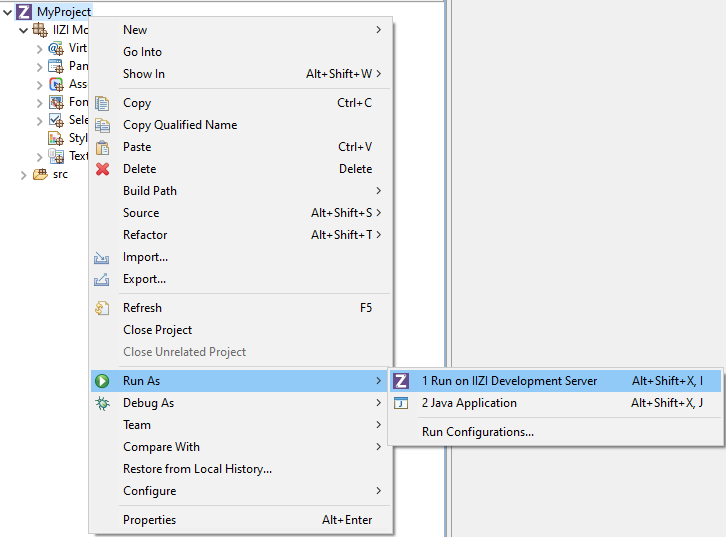
– You can also right-click your project and choose Run As > Run on IIZI Development Server which will open the Create, manage and run configurations window. You must double click IIZI Development Server in the tree view on the left, to open the iiziServer Editor.

The iiziServer editor for quick configuration of a development server
For the simplest development server set up, keep the config.iiziServer path as is, choose a range of ports, and leave the environment to the default file. Only one application per server is possible. Later, if you wish, you can configure multiple environment files. Click Run to start the server.
2 - iiziRun Developper
iiziRun Developper
NEED iiziRun (phone) Screenshots
iiziRun Developer is free to install from App Store and Google Play. The iiziRun Developer app is used to test UI designs developed with the iiziGo IDE. It also runs IIZI universal apps from an iiziServer without having to submit your app to Google Play or the App Store more than once.


Video tutorial for downloading and installing iiziRun Developer at the iiziPlatform YouTube Channel: https://www.youtube.com/watch?v=t1Z7r6HsJIo
After installing iiziRun Developer on a mobile device, configure a server and choose your iiziApp. At this point in your set up, your iiziServer must be running in iiziGo.
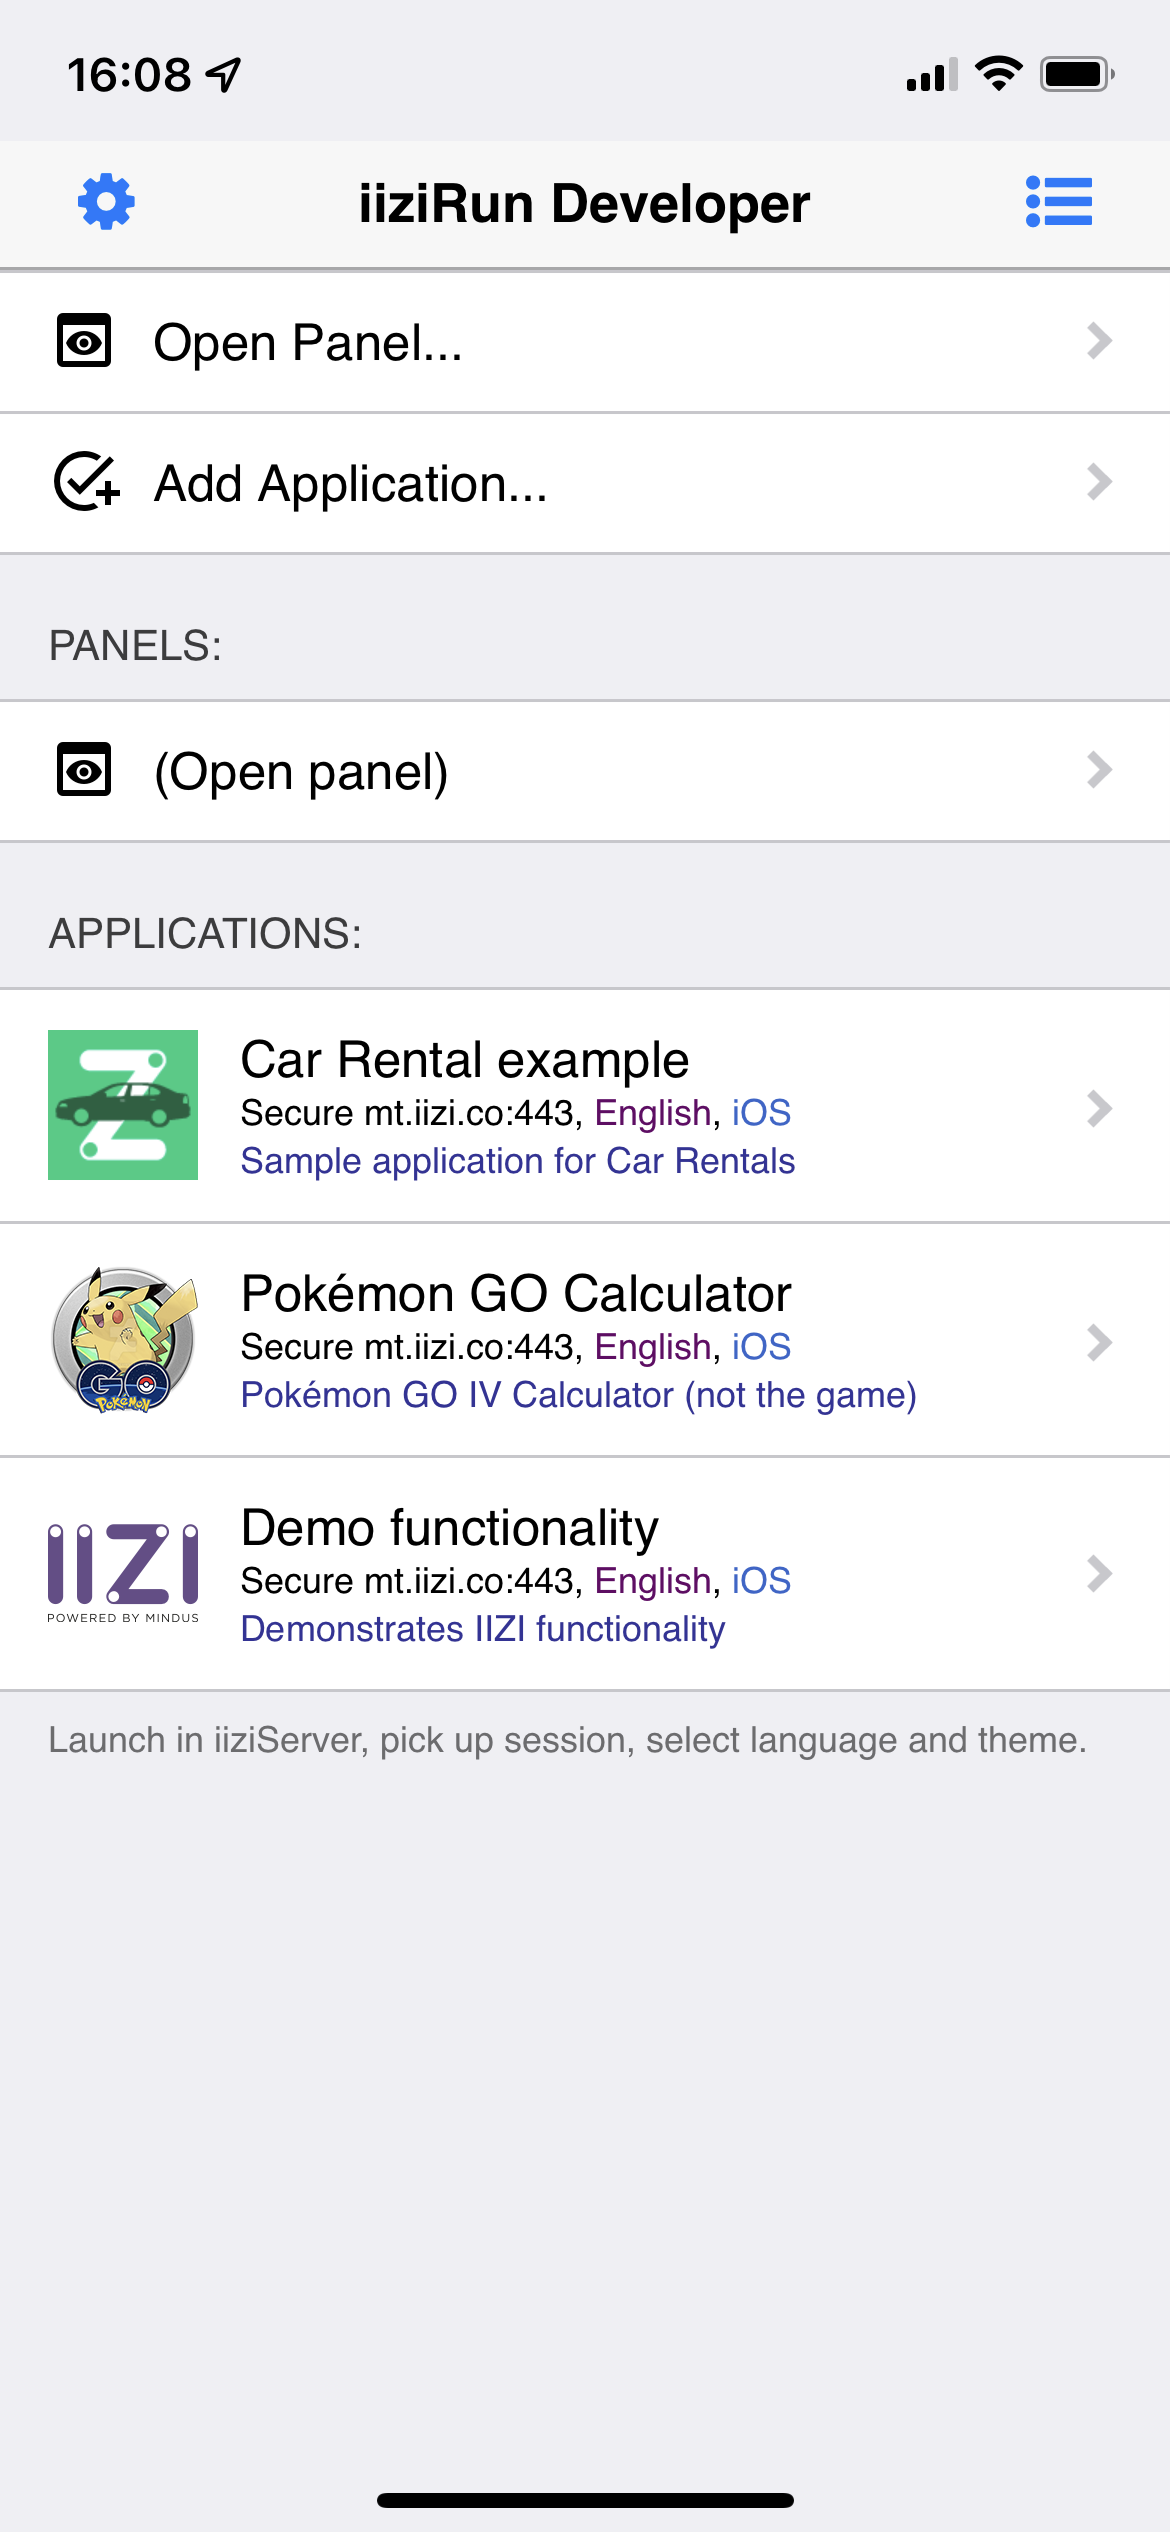
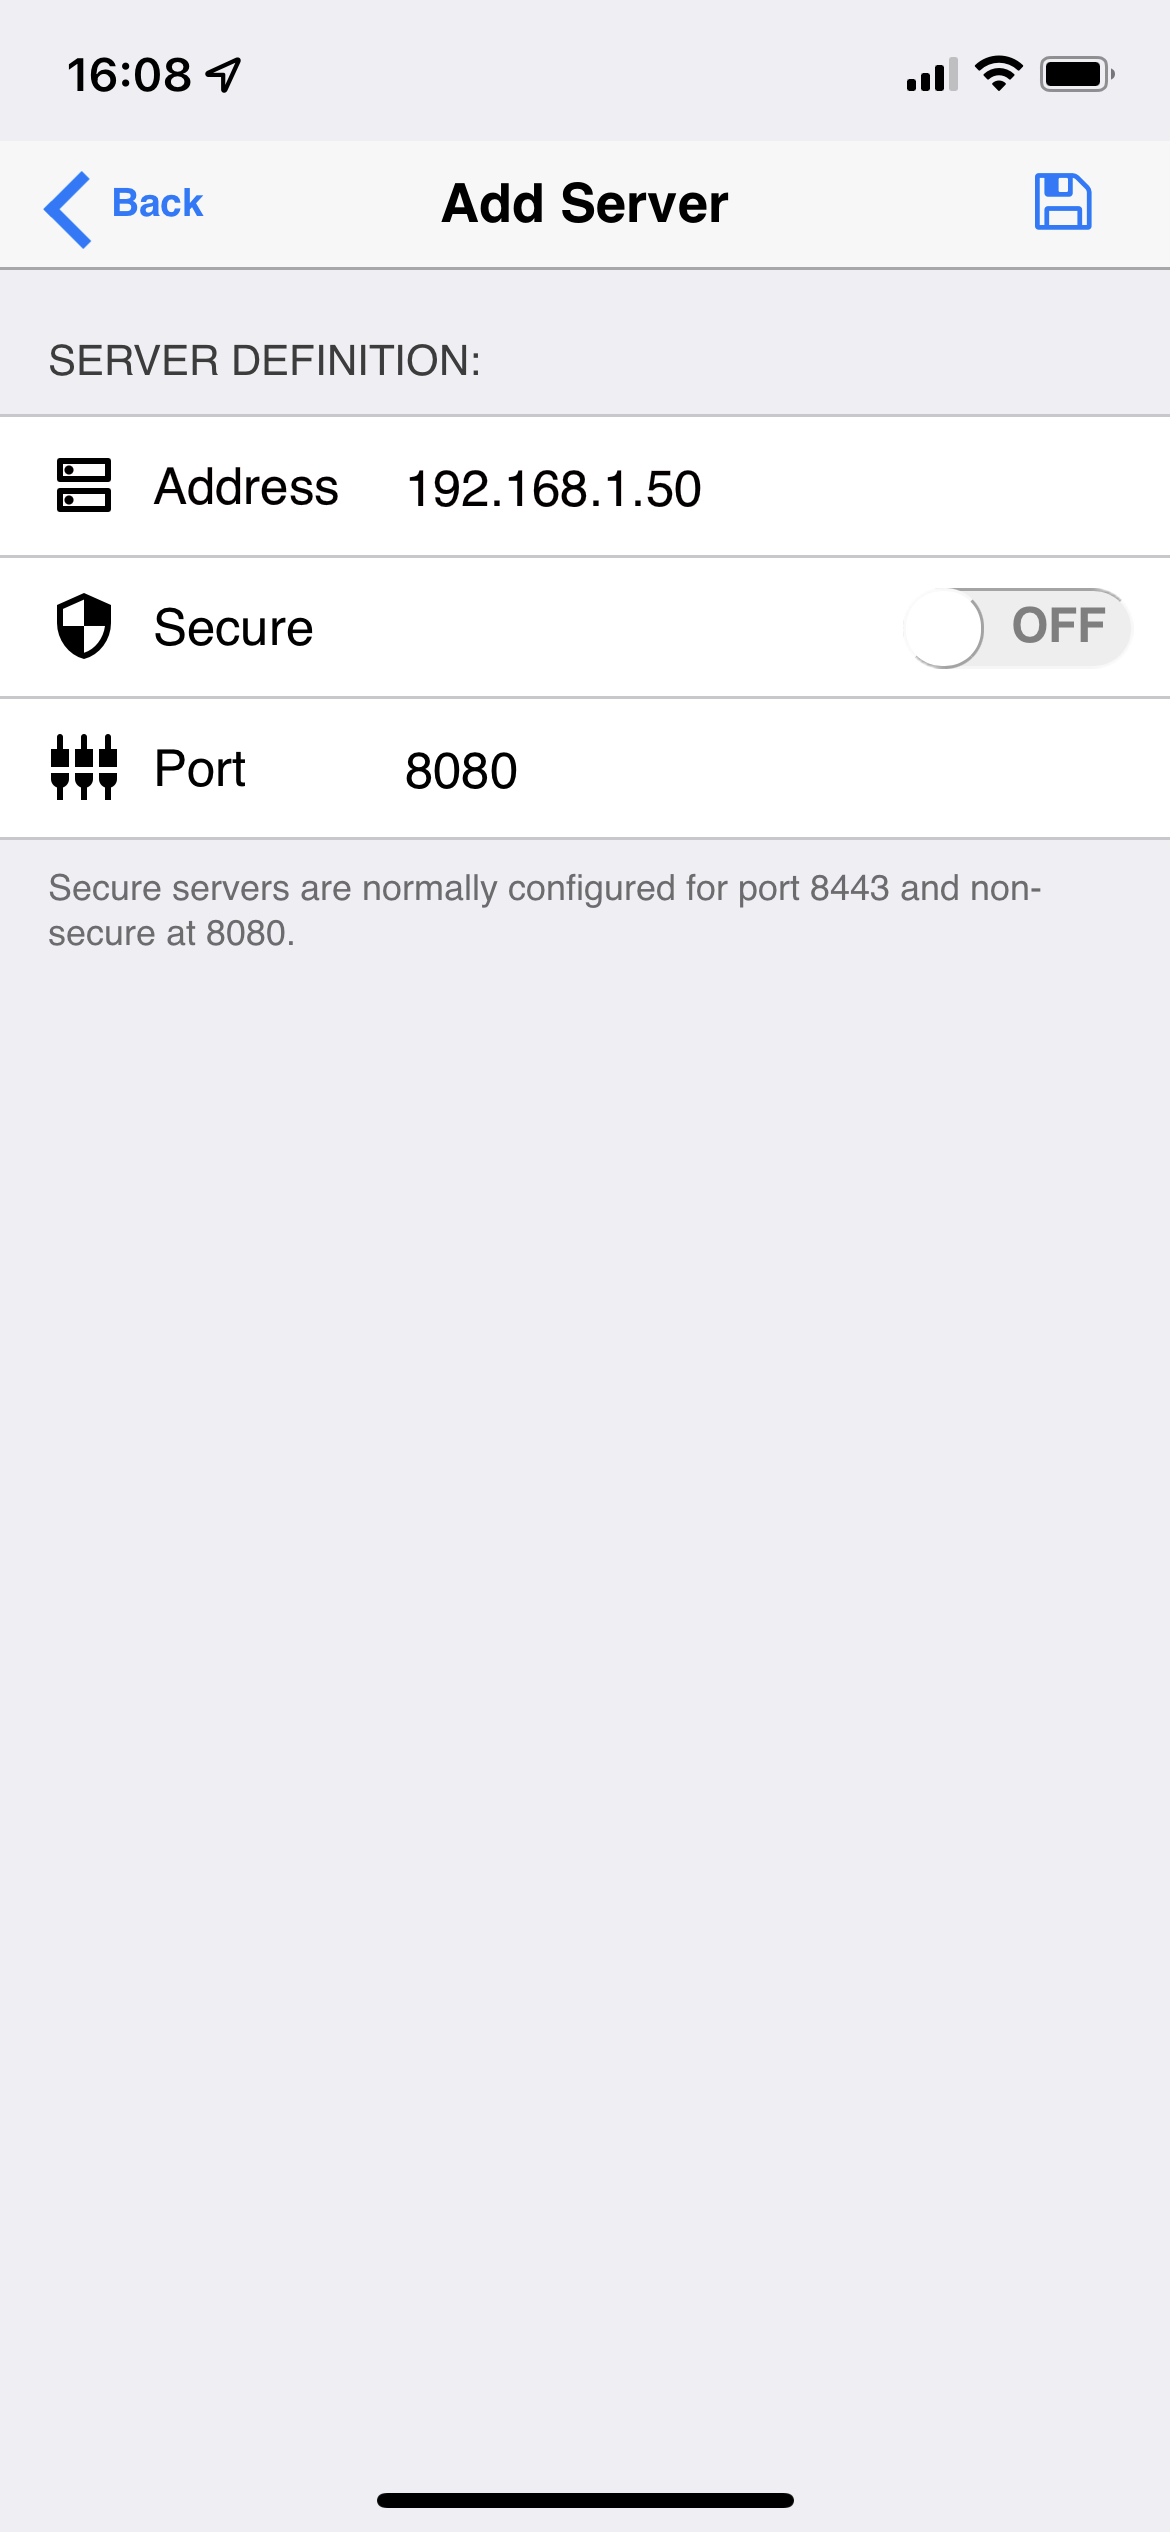
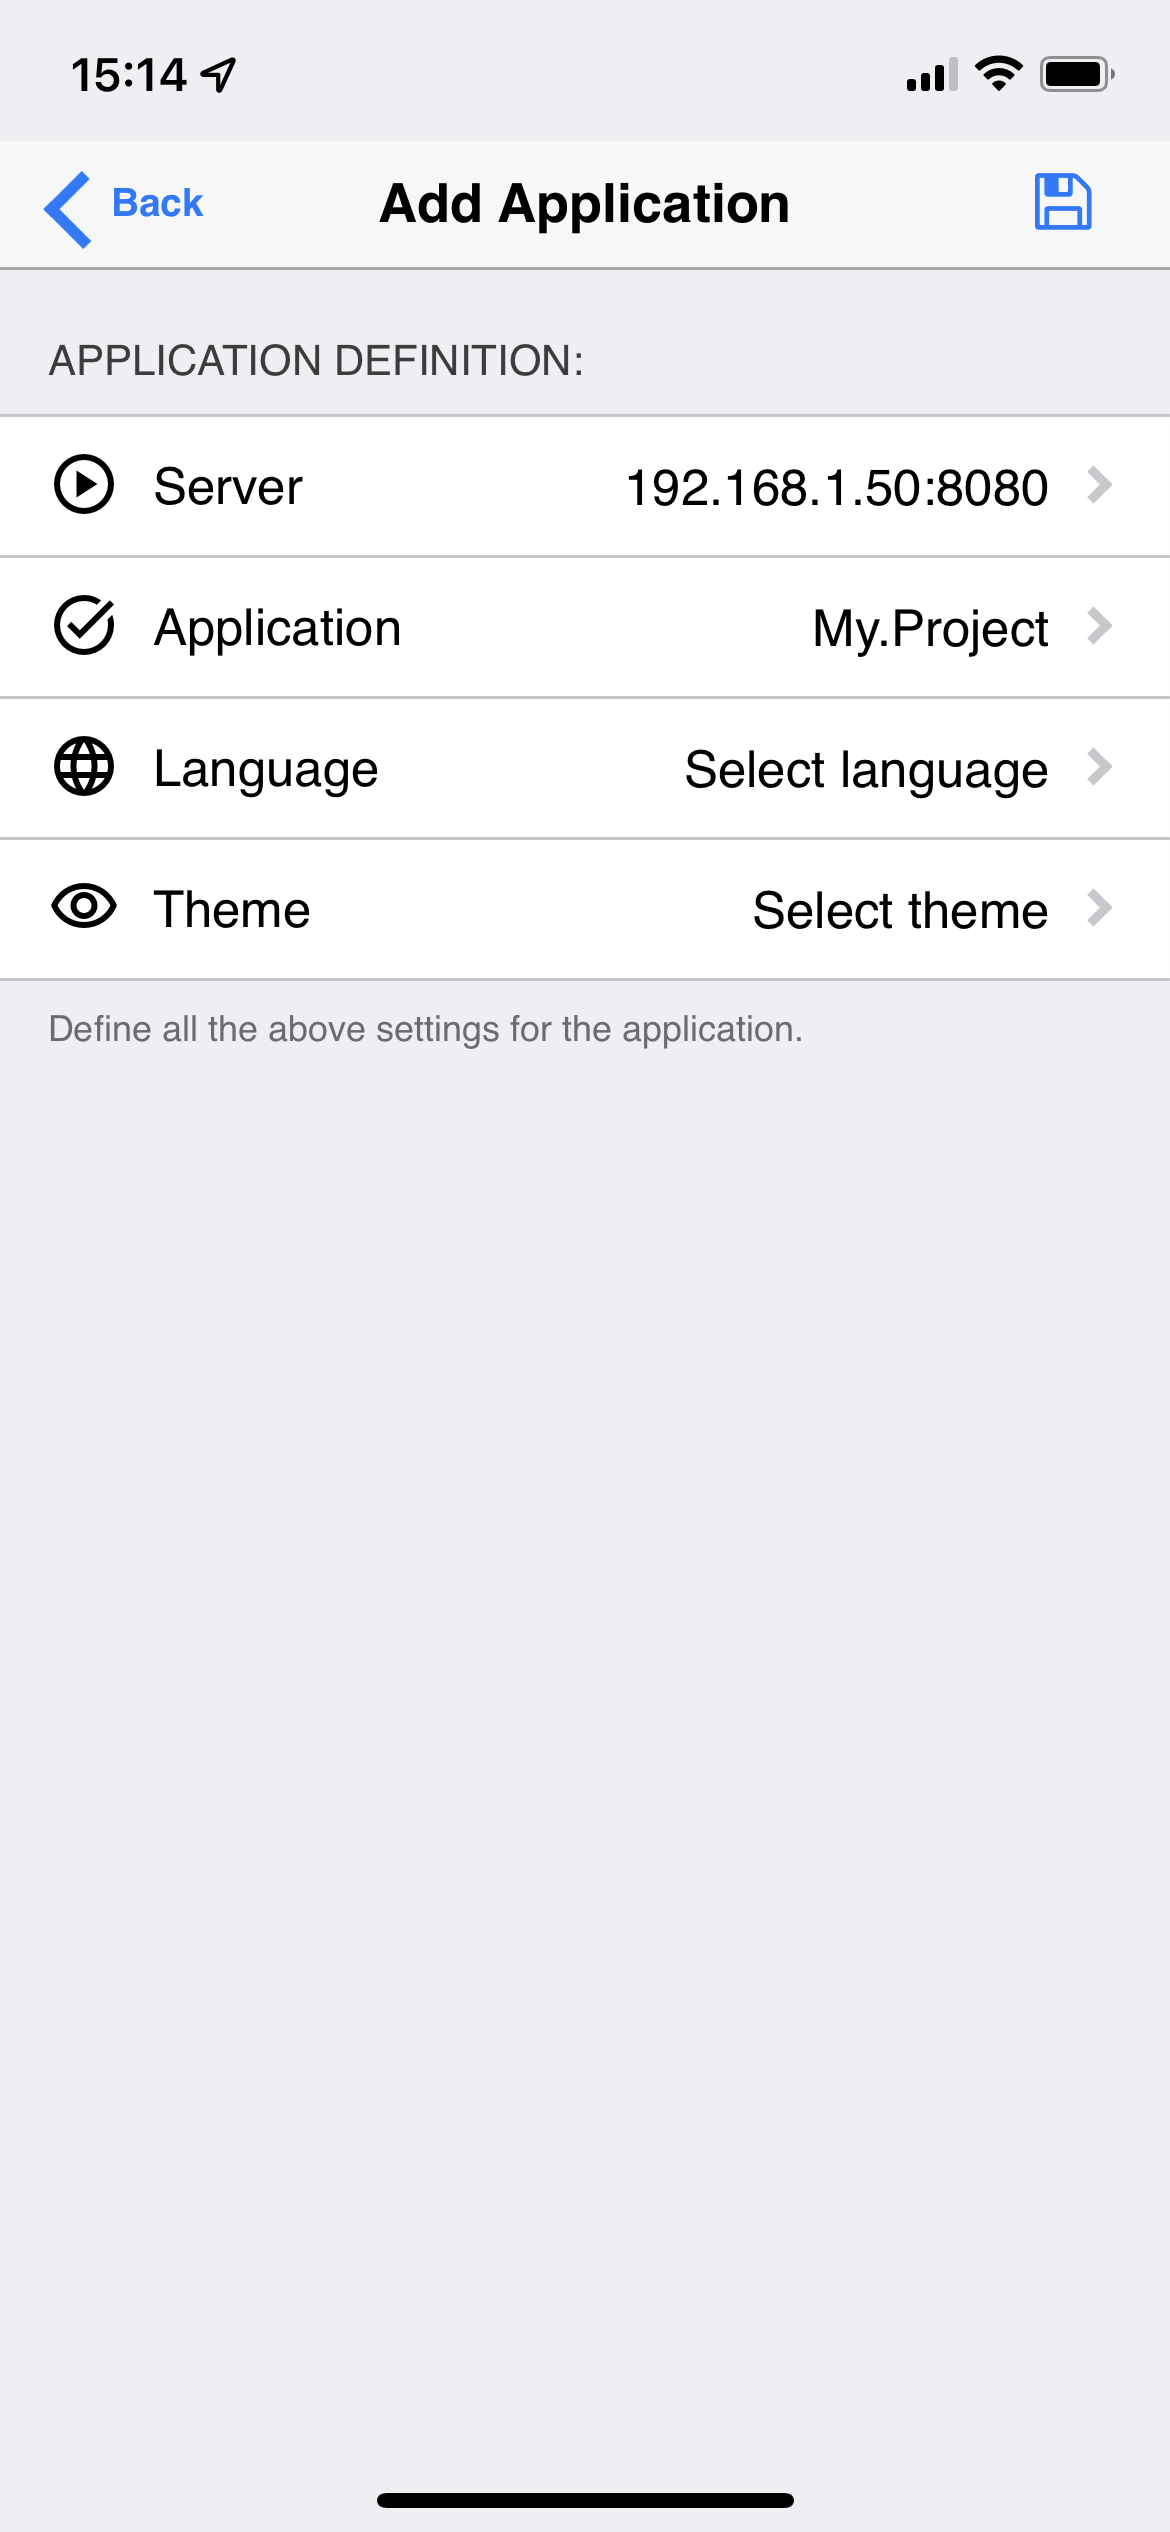
On opening iiziRun Developer you are prompted to open a Panel or add an application; tap Add Application and continue directly to Server and then tap Add Server.
Having chosen Add Server, enter the server definition and port for your computer’s local IP or local network IP, and click the blue Save icon at top to save. Upon tapping Application you should find your current iiziApp available, tap it to choose it, and once added, tap the blue Save icon at top. Repeat the above process for any phone or tablet you wish to use for development and testing.
As you develop your iiziApp, you can update and view your work instantly on connected devices with iiziRun Developer. Connect as many devices as you wish for viewing and testing you Java code, Panels and components, or any other app functionality.
Panel Design and the Panel option on iiziRun Developer
In addition to runtime tests, you can choose any Panel from the iiziRun Developer Open Panel section and develop with your device connected by Wi-Fi or by cable. The Open Panel option in iiziRun Developer does not require running the IIZI Development Server. All changes made to your Panel should update immediately on all your connected phones and tablets without needing to refresh or relaunch. This view of a single Panel displays the iiziGo’s localhost design view, and like the Design Editor, does not include UI actions, links or connections to other Panels.
To connect a device to the iiziGo localhost instance, choose Open Panel in iiziRun Developer and set up an iiziGo instance by tapping: iiziGo instance > add iiziGo. Here you can add your localhost address or IP.
3 - iiziRun Custom
iiziRun Custom
To finally release an iiziRun Custom app that is branded for use with your new application and for submission to the App Store, Google Play, and the Microsoft Store, you will use the iiziRun Builder utility integrated into the iiziGo IDE. The resulting mobile app is given a custom graphical appearance to represent your software’s branding and meant to be downloaded by the consumer of your application.
The difficult process of submitting to the App Store, Google Play and the Microsoft Store is automated for you in the iiziRun Builder workspace where you prepare the explicit build requirements for each.
By right-clicking your project and choosing properties and expanding the IIZI option, you will find three further options App, Distribution and Runtime. Choose Runtime to display the iiziRun Builder instructions and forms necessary for the creation of your iiziRun Custom app.

The instructions and forms under Runtime for enabling iiziRun Builder
This iiziRun Custom instance carrying your application branding will be submitted only once to each mobile app distributor i.e. the App Store, Google Play, and the Microsoft Store. All further versioning and updating of your application will be made to the iiziApp that has been deployed to your production server.
4 - Distribution of your iiziApp
Distribution of your iiziApp
There is a tutorial video just down below.
Note: This option is not yet available for the early access.
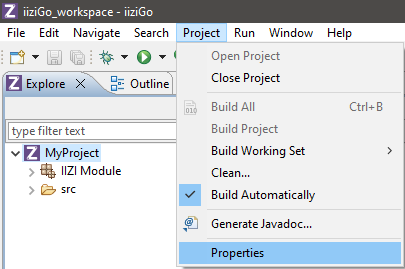
Your IIZI project can be built and deployed to your server through the Distribution option under IIZI found in your project’s properties.
The developed iiziApp can consist of Module projects and Java projects. It can also refer to libraries and directories containing Java code, both project-based and external. In order to run the application on an IIZI Server, the iiziApp must be compiled into a Jar file. The iiziApp compiled into a Jar file is called an Application Distribution. The process of creating this Jar file is called Application Distributor.
The Application Distributor is a utility that is integrated in iiziGo but is also available as a stand-alone Java program that you can run from a batch file or a build system, e.g. Ant.
Configuration
The Application Distributor must first be configured for a Module project to be distributed. Open the Module project properties dialog and select Enable Application Distribution:
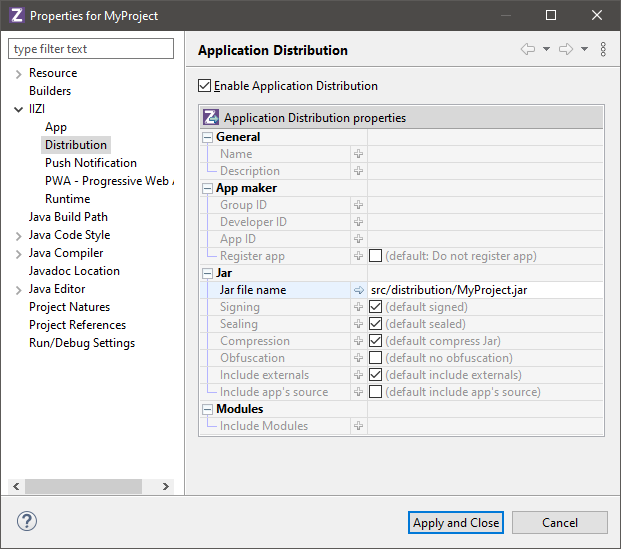
Fill in the Jar file name. If the iiziApp consists of several modules projects, specify them in a comma separated list in Include Modules. Dependent modules and Java project, libraries and directories are always added to the Jar file, with the exception of externals that provides a separate option for the operation to perform.
Dependent modules are known at build time of the distribution when all references are resolved. All the referenced modules (including their references) will therefore be included in the iiziApp. Dependent Java projects, libraries and directories are known from the Java Build Path.
Externals
The Externals are external libraries and directories that may be specified in the projects classpaths of the Java Build Path.
If you do not include externals, the Jar file will be smaller and if several module applications share the same externals, you will use less memory for the server because it will only be loaded once. However, the externals must be in the server classpath.
Note: Be careful with this option, as the same class may from a library or a directory can be loaded several times from different iiziApp’s, and each class static (instance) will not be same between two iiziApp’s (meaning that there can be multiple “static singletons”). If this could be the case, you will have to unselect the option Include externals and to set the classpath of the server to include these externals.
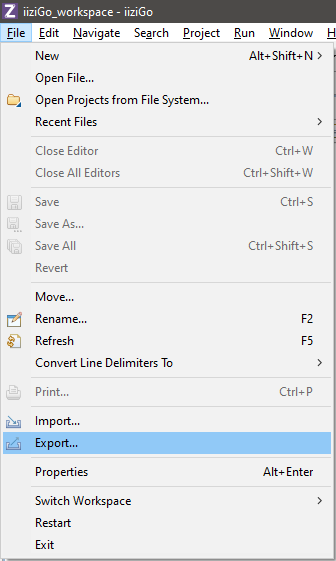
Exporting iiziApp
The iiziApp is created by exporting the Module project. Open the Export Wizard using File → Export:
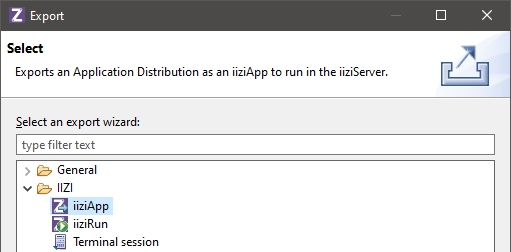
Click on Next and select the project to create a distribution for:
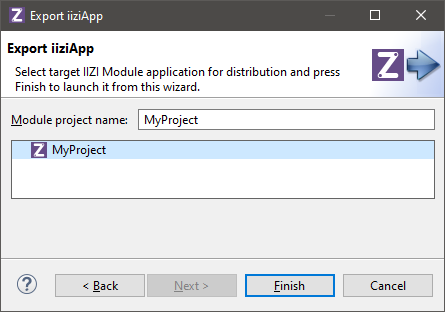
Only projects configured for application distribution are shown above.
When you press Finish, the Application Distributor will be started in a separate Eclipse job.
Note: An application containing errors and/or warnings cannot be exported!
5 - How to run your application?
How to run your application?
How to run your application?
There is a tutorial video just down below.
You need a QuickStart project:
- Select
File > New > IIZI Module Project (Quickstart) - Enter
project nameand unselectCreate text tables with automatic translation - Press
Finish
- Select
Right click on
your project name- Select
Run AsthenRun on IIZI Development Server - Press
Yesto add newRun Configuration - Right click on
iiziDevelopment Serveron the left - Select
New Configuration - Enter a
namefor the configuration, we recommend to use same name as your project - Here you can manage your application settings
- Click on
ApplythenRun - Server logs are
displayed on the bottom partin Console
- Select
You can add
another perspective view- Go on
top right partof iiziGo - Click on
window iconthen selectDebug - You added another perspective to switch on when you start your application
- Go on
To test it:
- You need to
open your browserand go to: http://localhost:8080 - Click on the link:
here - Then click on
Startto launch the app in the browser
- You need to